Since the start of the new year, I’ve been looking for better tooling to improve the way that I conduct my daily tasks. This has taken me through a journey ranging from Time Management to Motivation and it has helped me remain focused and draw new inspiration from not only my work, but also my personal life.
Since those were mostly mindset changes, I also looked at the methods that I was using during my workday, the software that I was using, and if there were any methods that I could use to improve these tasks. Not only by making them more efficient, but also determining whether there were ways that I could limit the conversion between different platforms, such as from a note-taking application to GitHub, or from a screenshot to a detailed screenshot with my notes.
There are a ton of methods that can be used to take effective notes, and I’m not going to delve into the semantics of effective note-taking, if you are interested this blog post covers some creative ideas which you can use. What I am going to be focusing on is the software that I use on a daily basis.
Note-taking with Obsidian
Over the course of the past few years, I have tried various applications, including:
The list goes on, and for the most part I was very fond of CherryTree, however since it ended mainstream support I decided that I needed to find a new note-taking application. After reaching out to a few colleagues, I came across Obsidian.
Obsidian is a powerful knowledge base that works on top of a local folder of plain text Markdown files.
The part that interested me from the start was the fact that it made use of Markdown. From the onset of this blog, I’ve made use of markdown files within Visual Studio Code and, while this works perfectly for this format, I could never find a good way to take notes for my job (which requires a local instance without cloud sync) or for CTFs using this method. Since I started using Obsidian, I have been really impressed with the ease of note-taking and how quickly I have been able to adapt to it.
Initial Installation
Installing Obsidian on Windows is just a matter of downloading the application. However, if you are looking for ways to install it on Linux, the method that I used was to download the .AppImage file, move it to /.local/bin and give it executable permissions with the following commands:
1
2
mv ~/Downloads/Obsidian.AppImage ~/.local/bin/obsidian
chmod +x ~/.local/bin/obsidian
Issues with Obsidian
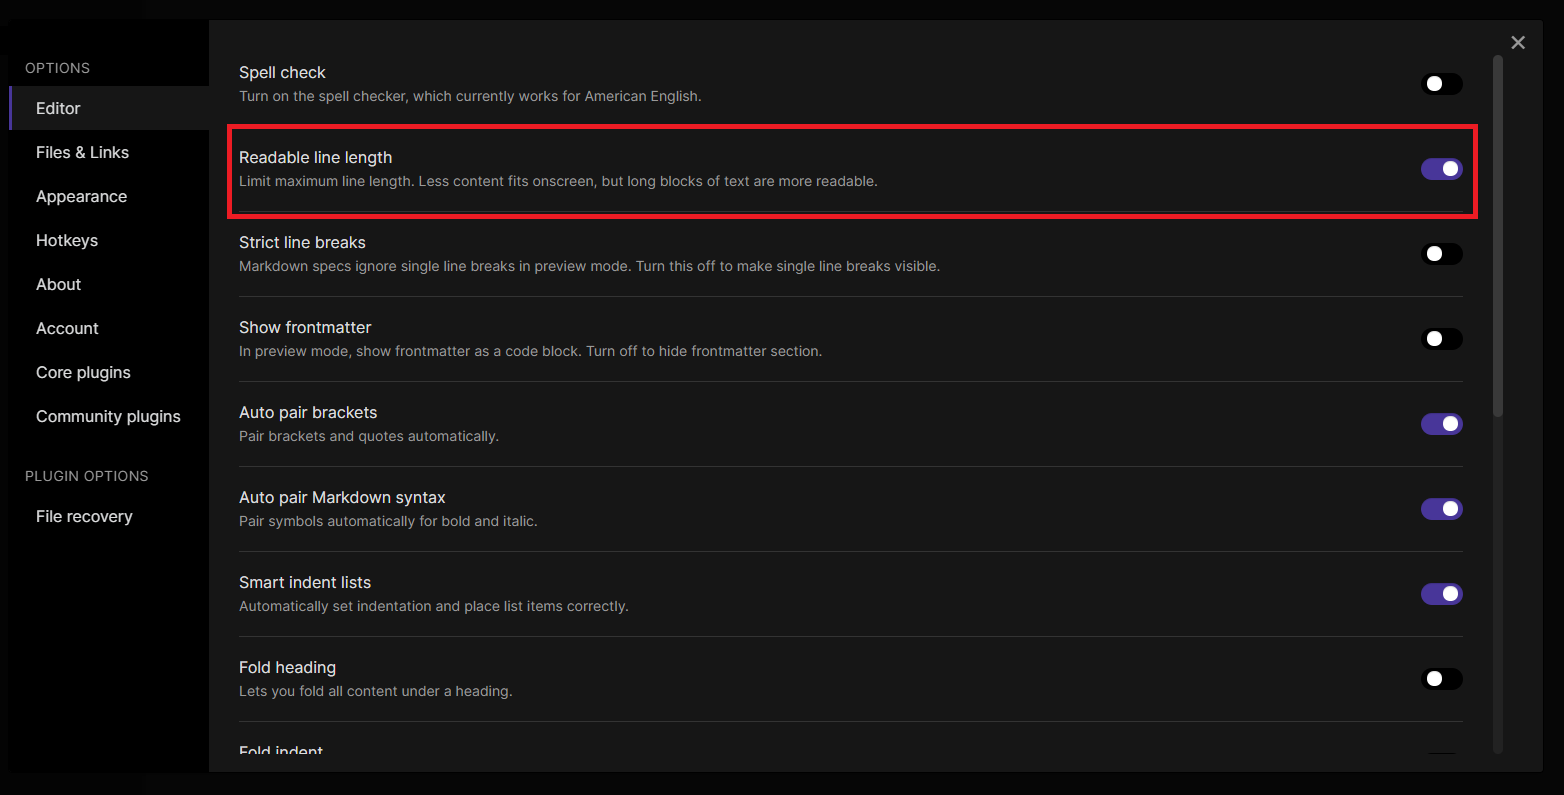
While I do enjoy Obsidian thus far, I have come across a few points which have annoyed me. The first of which was that Obsidian can only ingest markdown files, and since I used CherryTree for years, it took me a substantial amount of time to convert all of my files to markdown. The second issue that had was the default layout, however that was a quick fix by navigating to the settings menu and changing the Readable line length option as shown below:
The final issue which still annoys me is the way that Obsidian handles attachments. I have found a workaround, however I would like to see a feature introduced whereby you can hide content that you do not want to see on the sidebar. In this instance, when you insert an image/attachment into the application, it creates a link to the resource. Those links are – by default – placed underneath your last note/folder as shown in the image below:
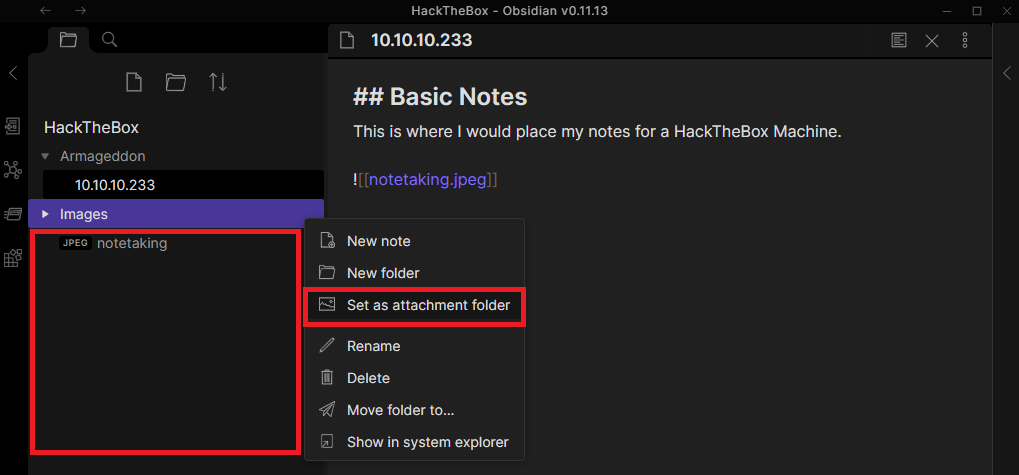
In order to circumvent this issue – I had more than a hundred images so the layout of the navigation pane looked terrible – I created an Images folder and used the Set as attachment folder setting to ensure that all future attachments would automatically be placed within that directory.
Taking Screenshots with Flameshot
When taking screenshots, I generally use keyboard shortcuts, however editing those images can sometimes be a pain. I personally enjoy having a screenshot application like Gimp and I was ecstatic when I came across Flameshot which is actually user friendly.

Powerful yet simple to use screenshot software.
Initial Installation
I am not sure if this is available on Windows. When installing it on Linux, I generally create a keyboard shortcut. Within the Keyboard settings, I changed my default print function or printscreen function to launch Flameshot using the following command:
1
/usr/bin/flameshot gui
Conclusions
After converting and changing some default settings, Obsidian has worked out perfectly for my purposes and it is really simple to use, while also being visually appealing to me. Regarding Flameshot, I have not had any issues with this tool as of yet, and I really enjoy being able to edit images during a screenshot and having the option to copy or save the image after all editing has been completed without the need for other applications.
This is not meant to be a long blog post or contain everything that is possible with these two applications, rather it was meant to provide you with my initial impression of the applications and additional insight into note-taking software if you are looking for a change.